If you’re here, you probably followed my other article on Setup Salesforce devOps Center were we learned how to initialize the devOps center to make it ready to use to deploy. If it’s not the case, you should take a look at it, because these steps are mandatory before to use it.
This article is part of a group of articles around setup of Salesforce devOps Center. If you don’t find what you’re looking for here, check the other articles:
- Setup devOps center: activate, install and assign permissions
- Link your devOps center to Github, build your devOps center pipeline (this article)
- Start working with work items and deploy through the pipeline
Github setup
If you want to use Salesforce devOps Center, one of the prerequisite is to have a Github account. If you don’t have, you can register for free, and if you wish, several paid plans are available, depending on your needs.
Unfortunately, Salesforce devOps Center doesn’t work with other GIT providers like Gitlab, Azure devOps or Bitbucket. So, ensure to have a Github account and the permission to create a repository.
Let’s go !!!! If you have not, Open the devOpsCenter app:

Then click on new project and on “Connect to Github”
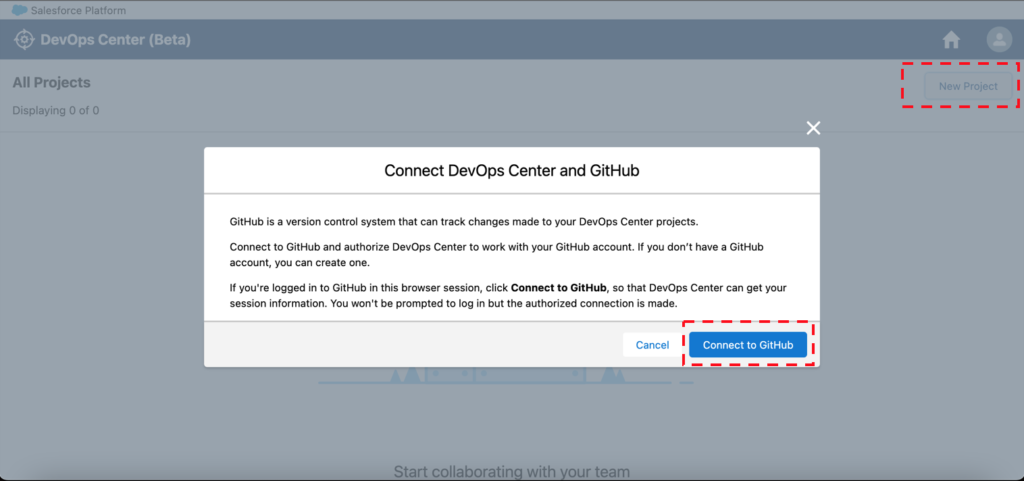
When you’re redirected to the login page of Github, enter your credentials.
You’ll then be redirected to the Salesforce devOps center.

When in the devOps center app, then, click again on the “New Project” button.
This time it will open the following window:
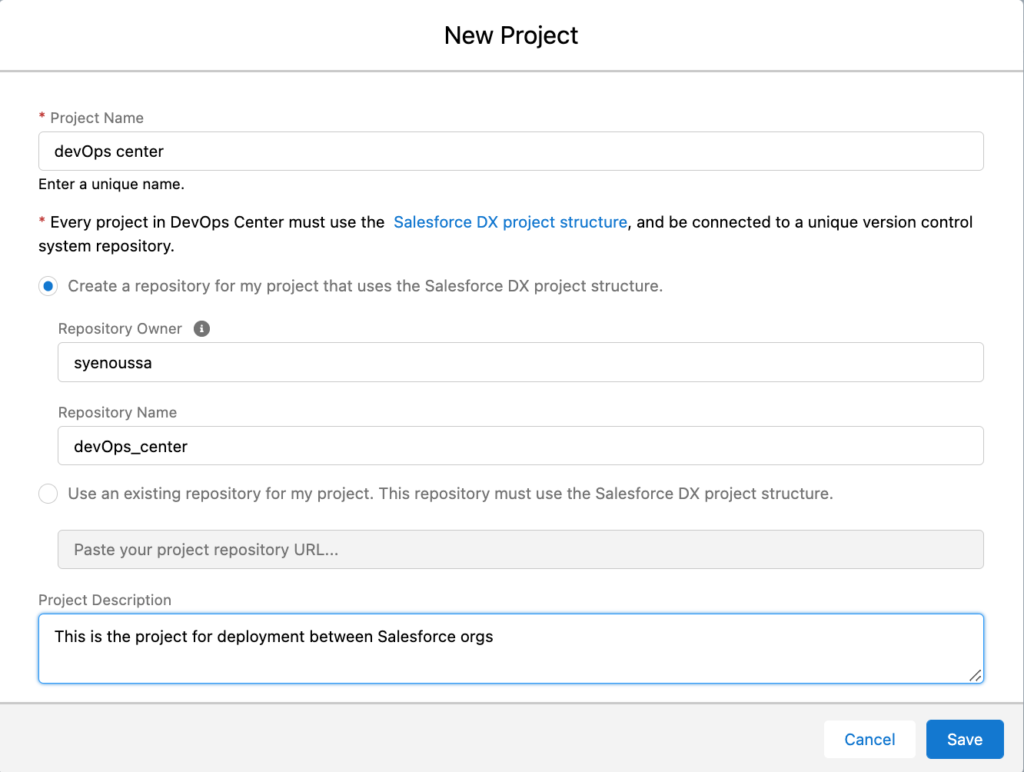
In this window, you have the choice:
- use an existing repository (it MUST be an SFDX project with the adequate structure)
- or create a new repository, like me. The devOps center will take care of the creation for me 🙂
Hit the Save button to validate your choice.
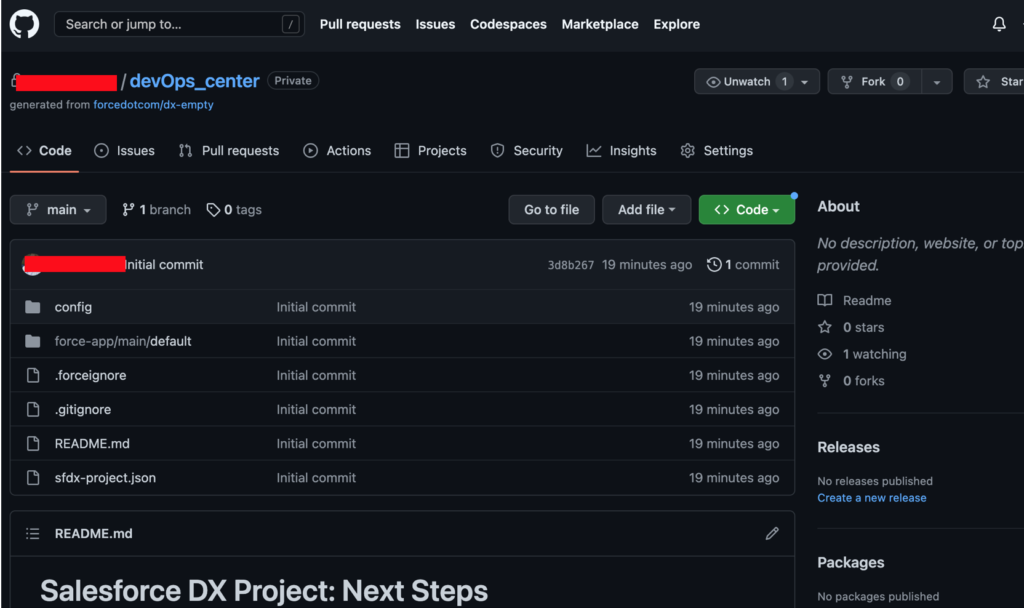
If you connect to Github, you’ll see that a new repository have been created (if you chose the option) containing an SFDX project and the project have been created in the devOps center:
Connect Sandboxes / Production orgs
We have set up the Github repository, now it’s time for us to connect the orgs to the devOps center where we want to deploy the customizations we want.
Come back to the SFDC devOps center and click on “Click to Connect”

Fill the required information, especialy the name of the environment (dev, uat, preprod, valid, prod…), click on Log In and authenticate yourself.
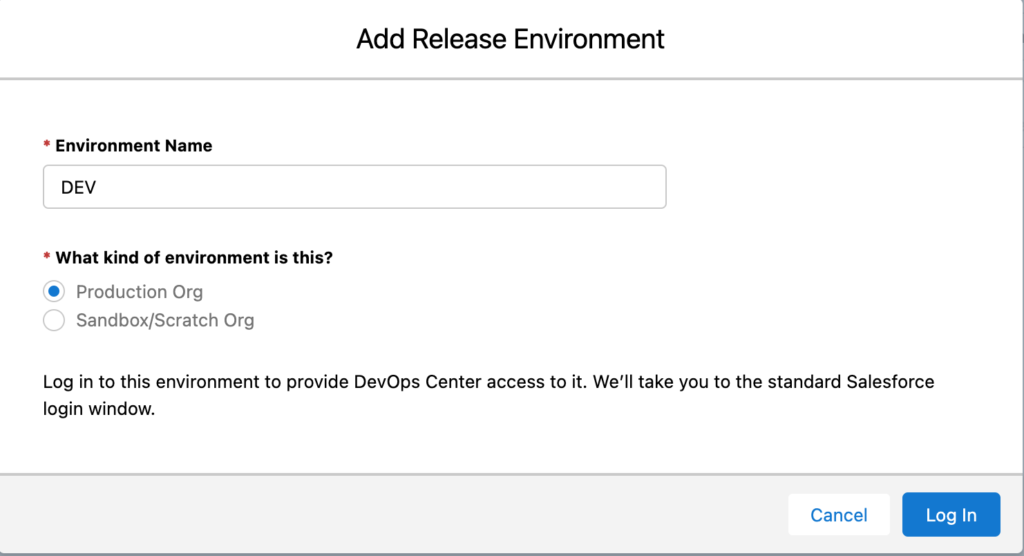
When back to Salesforce, you’ll see that your environment have been successfuly added.
Then click on your project name (here devops center) to add another environments.

Then click on setting to access the environments (we’ll take care of configuring the pipeline later):

Click on Add to add a new environment:
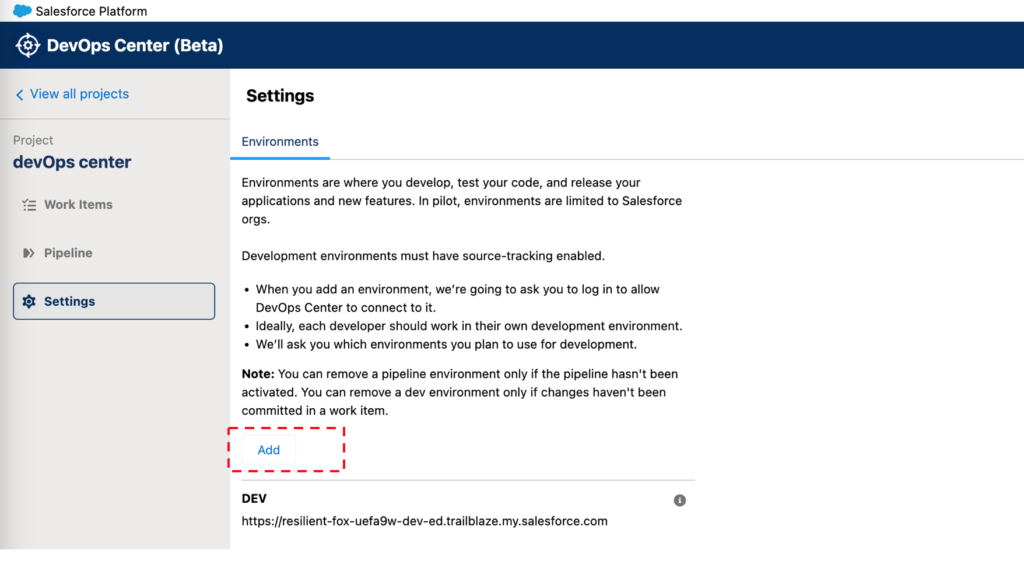
Note that at this step the window is quite different because you can mark the environment you’re adding to be “used for development”.
What does it mean?
Well, it means that with this option checked, this development org will track the change you do and will present it to you in the devOps center.
Check if the checkbox if you’ll perform changes in the org.
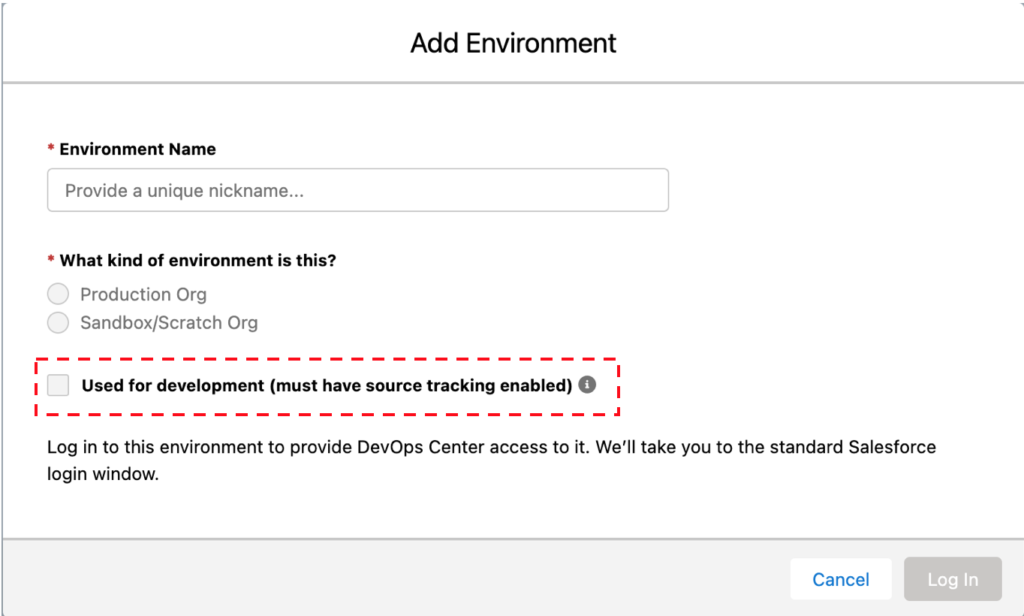
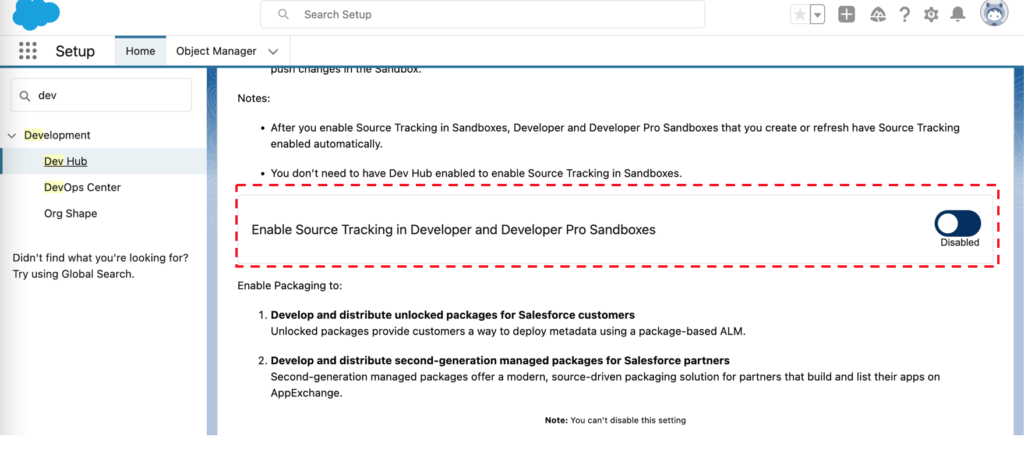
You can check it, you also need to Enable Source Tracking in your production org.
How to enable source tracking ?
Go to Salesforce > Setup > Dev hub > Enable source tracking and Enable the feature
Repeat for all the environment you need to work on: UAT, DEV, PROJECT1 , PROJECT2, UAT, PREPROD, PROD… it’s up to you, your release plans, your strategy, your needs…
Configure the pipelines
Wow! We’ve done a lot of work, didn’t we?
Now the time has come to configure the release pipelines. What are pipelines? The pipelines are the configuration that will allow you to move customizations from an org to another.
It’s in pipelines that you’ll configure this behavior.
For me, in order to simplify this tutorial, I use only three envs. You might use more, depending on your needs: PREPROD, UAT, PROD…
Click on pipeline in the left sidebar. It will open the following screen:

As you can see, the Pipeline screen comes with a default “out of the box”: Integration, UAT, Stagging, Production. Once again, this is only to show you what’s possible, you have to add / remove the stages depending you release plans requirements.
To add / Remove stages, click on the arrow next to “Stage Name”. It will allow you to manage your stages.

At the end of the configuration, I get the following configuration:

Here are some explanation regarding this configuration:
- Stage Name: to be consistant, I call the Stage name with the same name I give to the Salesforce sandbox
- Environment: I chose the environment
- Stage order: I chose a quite classical release process: DEV -> UAT -> PROD that can fit small organization that don’t need a lot of validation or sync between envs
- Branch: Remember, at the beginning you have linked the devOps center with a Github repository. Now you have to link a git branch and a Sandbox. For more clarity, I created branches with the same name as my Salesforce Sandboxes
One point about the “This is the bundling stage”:

It indicate that the Org you are configuring in this Stage is an Org you are using for example to merge the work between several orgs.
So that after that you can bring to the next stage all the work items together.
When done, click on “Activate” to activate your pipeline!
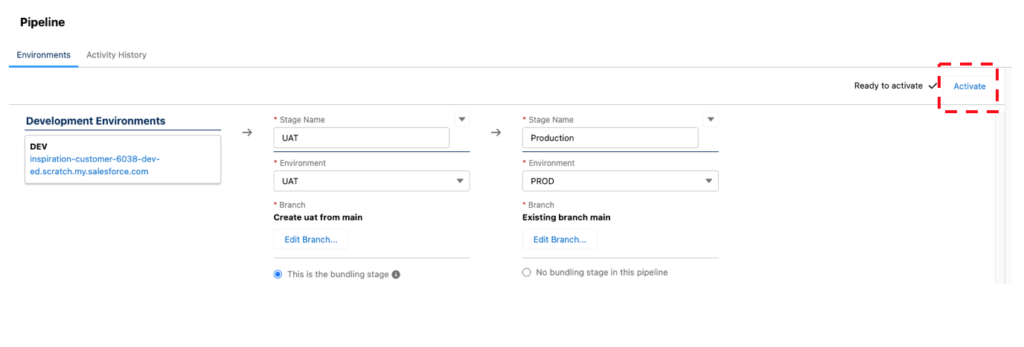
Now that you have activated you pipeline, it’s ready to create work items and move thing between orgs! Let’s see it in the next article.