This article is part of a group of articles around devOps Center. If you didin’t read it, please check it to make sure you have all the prerequisites in term of installation, pipeline configuration…:
- Setup devOps center: activate, install and assign permissions
- Link your devOps center to Github, build your devOps center pipeline
- Start working with work items and deploy through the pipeline (this article)
Now we will create things to migrate and proceed to see how it works.
Create a feature to migrate
For this tutorial, I’ll do 2 things:
- Implement a simple record triggered flow (that does nothing really interesting 🙂 ) Name: Change title / Flow API Name: Change_title
- Add a new field on the Opportunity standard object: Updated_Title__c
Create a work item in the devOps center
Now, I want to migrate those changes to the UAT org and then PROD through the Pipeline I created before.
For that, I create a Work item by clicking on the left on “Work Items” and then on the “New Work Item” button on the right.
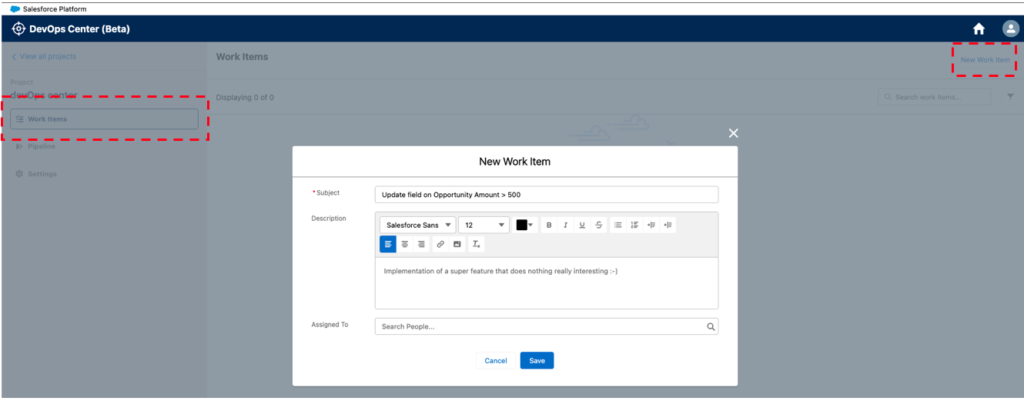
This work item will represent a part of the work I want to push until production.
For that, I recommand the granularity of a bug / user story, something that can be related to a ticket you or your team work on.
So, give the work item a relevant title. If you’re using a bug tracker or issue tracker like JIRA, you can also add a reference to the ID of the ticket it is related to in the Title. That’s good for tracability!
Click on save to create you work item.
Configure your work item

Now click on your work item. That will open a screen like the one on the above picture.
Our objective will be to:
- Compose this work item of things we want to migrate: the flow and the custom field
- Deploy thos changes to the other Sandboxes: UAT and then production
To compose a work item, as suggested by the two checkboxes, you have two options:
- First: Retrieve manualy the changes and commit them to Git (see my other article on how to retrieve changes)
- Second: Let Salesforce do that for you: work on an org, identify changes and add them to Git
For this tuto, I’ll choose the 2nd option: let the Salesforce devOps center auto detect the changes I’ve done in my Sandbox.
To go further, click on the proceed button.
Compose the work item with metadatas
Now we are going to add metadatas, configuration to migrate to our work item.
Remember that I previously added:
- A custom field to the Opportunity standard object
- A flow
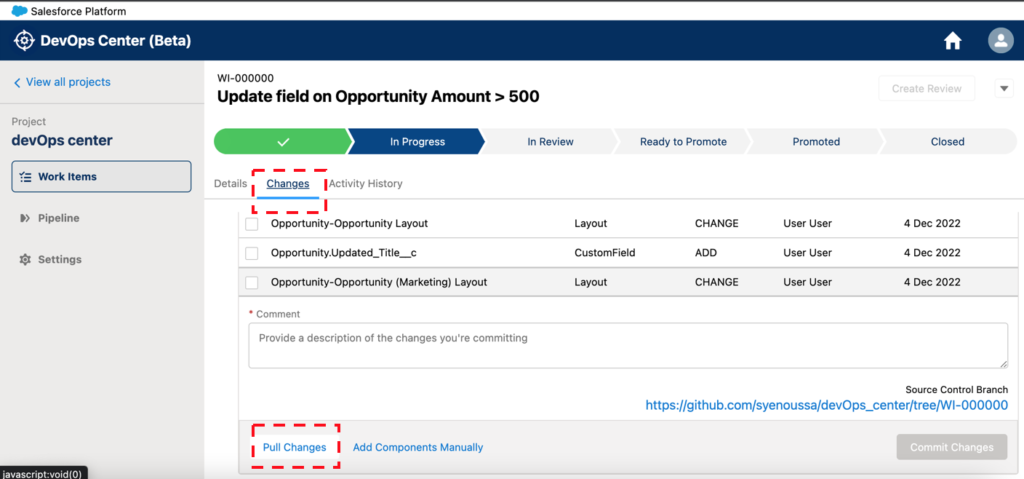
Click on the “Changes” tab and on the “Pull changes” to retrieve the metadatas on the development Sandbox.
This will retrieve all the modified metadatas.

In the above example, I have selected the two elements I have selected: the flow and the custom field.
In order to validate the retrieve of the 2 elements, I add a comment. This comment will be added as the Git commit message:

If we go to Github, we can see that the branch corresponding to the Work item have been pushed to Github:

Imagine you’ve forgot something, like a profile a permission set or a Layout (we can see that for example the Layouts of the Opportunity object have been modified when I added a new field)
You can select it and commit it on top of what you have retrieved/commited before.
Create review: Validate the build of your work item
When you have retrieved every element to build the work item by adding every modification you want to bring to the production, it’s time to create the review.
Click on the “Create Review” button
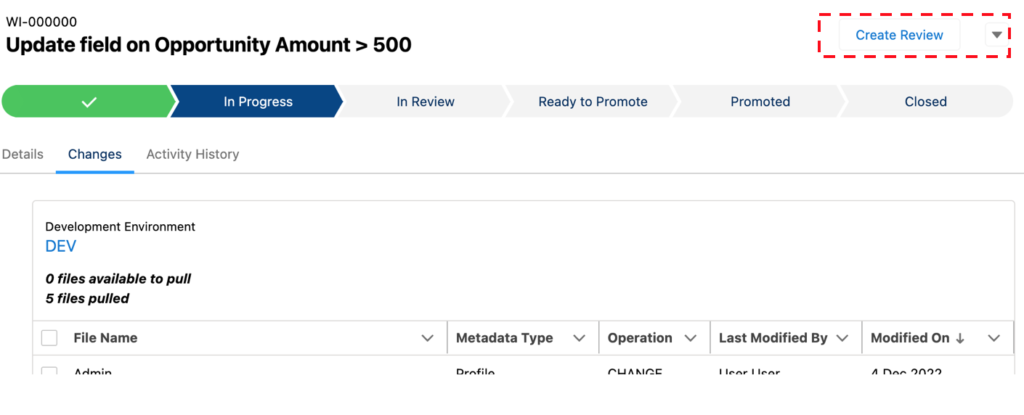
If we go to Github, we can see that clicking on “Create Review” have automatically created a pull request corresponding to the work item:

Let’s open the pull request and check that everything runs as expected.
We can see that the commit I’ve added is present:
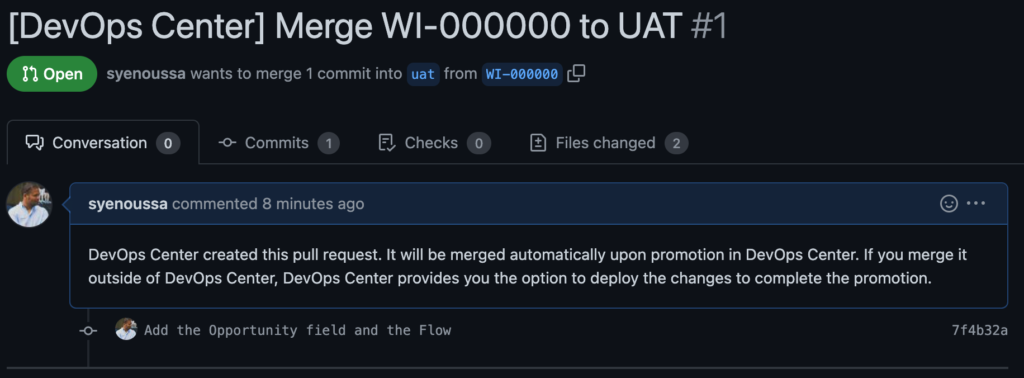
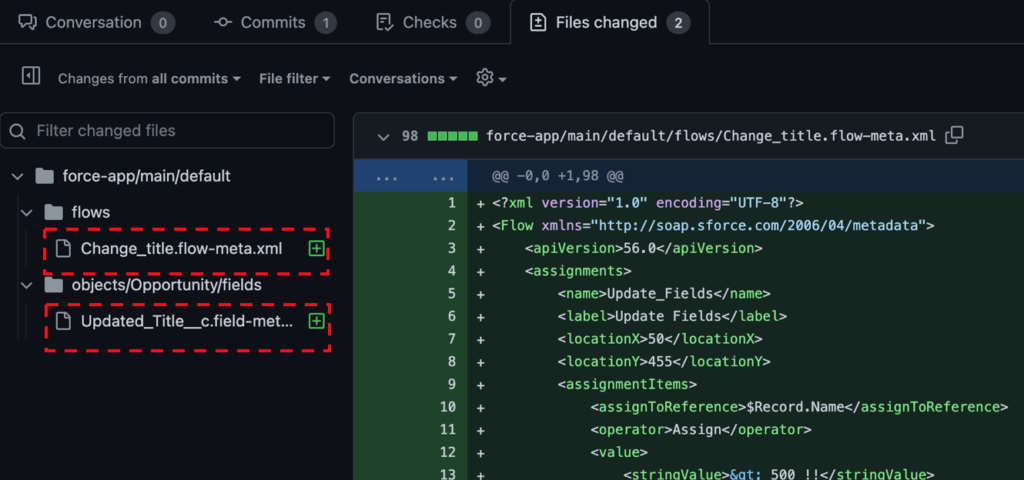
More important, let’s go to the “Files changed” tab to inspect the metadatas we are going to merge into the uat branch.
And… tadaaaaa !
As we can see below, the pull request contains 2 things: the flow and the Custom field on the Opportunity object.
Validate the work item in the devOps center
Everything is ok? You succedded to add everything to you work item? Everything was present as expected in the Pull Request in Github?
You did a great job!
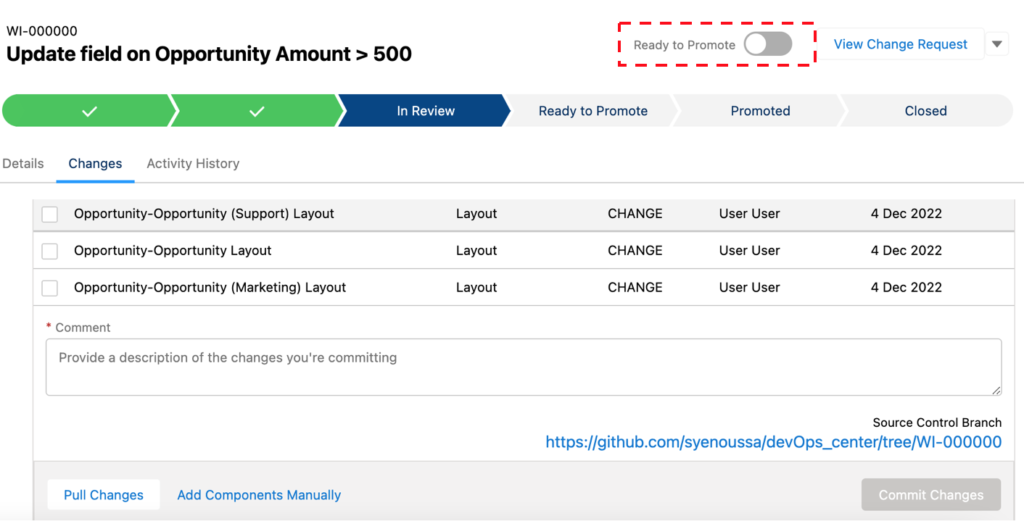
So, to validate, click on “Ready to promote”:
Promote the work item to the next Sandbox
Push work item to the next stage
Now the work item is ready to promote, and so, to be deployed on the next stage Sandbox.
So, to promote the work item, click on “pipeline” in the left toolbar.

Select the work item you want to promote and click on the “Promote Selected” button that appeared to deploy the selected work item to the UAT environment (you may have to enter your credentials)

After clicking, on “Promote Selected”, the “Promotion Options” window appears:
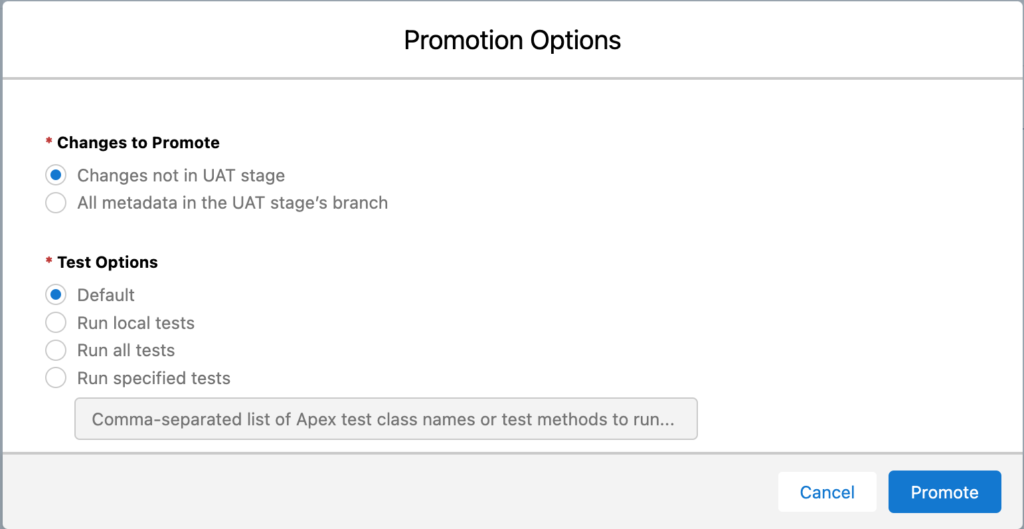
Here you can configure your deployment options.
Changes to promote:
- First option: only the new metadatas will be deployed to the target Sandbox. This is the recommended option by Salesforce, since it will deploy only a few metadatas
- Second option: All the metadatas in the branch (inluding some that may already be deployed on the target sandbox) will be deployed. It might take some time to deploy. It’s not the Salesforce recommended option.
Test Options are the Apex unit test that you want to run after the deploy. Chose the one that fits to you.
Click on the “Promote” button to promote your work item to the UAT Sandbox.
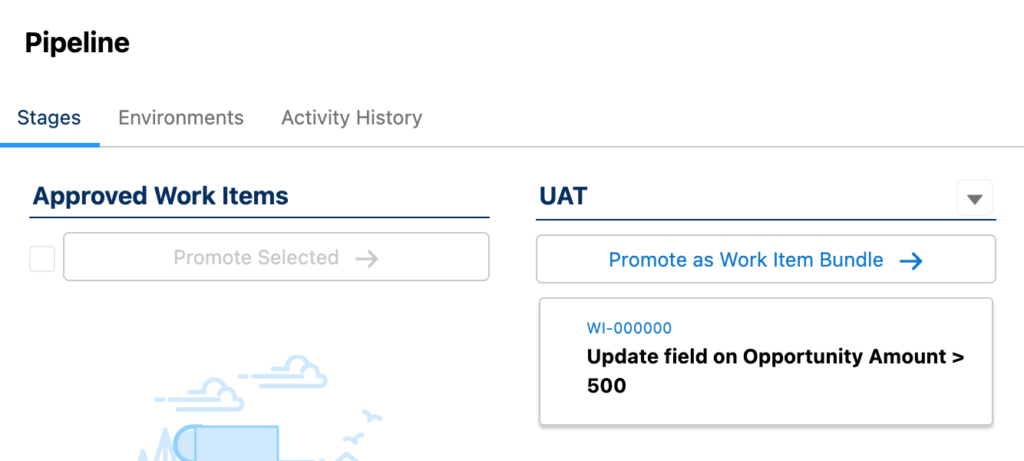
After the work item have been promoted, it comes to the UAT column, ready to be promoted to the next stage!
Verify the Work item promote worked correctly
Now, let’s check what happened behind the scene…
On Github:
We can see that the Pull Request we checked before is now merged and closed:

And we can see that a new Pull Request, waiting for promotion to PROD have been created and is openned:

What about the metadatas?
It’s ok for the Flow:

And it’s ok for the custom field on the opportunity object!
