You wish to setup Salesforce devOps center or you’re looking for information to see on how you can use it.
Released in June 2022, Salesforce made it available for free to all the orgs. So let’s see how it works and how it can help!
This article is part of a group of articles around devOps Center where we will build a complete devOps pipeline and deploy metadatas:
- Setup devOps center: activate, install and assign permissions (this article)
- Link your devOps center to Github, build your devOps center pipeline
- Start working with work items and deploy through the pipeline
Salesforce deployment
Everyone who have already done some deployments on Salesforce knows that it can be hard, especially if you try to deploy a lot of metadatas. Maybe you’ve been struggling using changesets and got some headaches 🙂 and you’re looking for another way to do your deployments for example from DEV to INTEGRATION or UAT Org.
Other solutions exist like Gearset or Copado (to deploy SFDX project for example). These are great solutions provided by vendors independent from Salesforce, with licence costs. We’ll not discuss on this today!
Salesforce devOps center
Salesforce recently released the devOps center that will be, for sure, the next standard way to deploy metadatas and the new way to release to release to PROD all your customizations.
In the following demo / tuto, I’ll be using an org that is a Salesforce Developer Edition. If you need to activate the devOps, go to your production org.
Enable and install the package
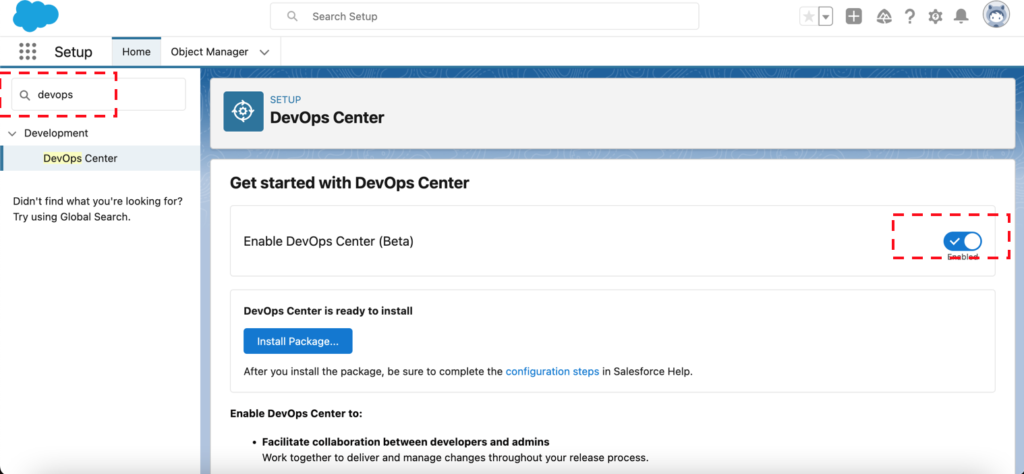
In the menu, search for devOps and Enable devOps center

The setup of the devOps center requires to install a package from the AppExchange. Click on the “Install Package” button to proceed.

Create a connected app
Good job!
If you are at this step, you have successfully installed the devOps center package. Now let’s create a connected App.
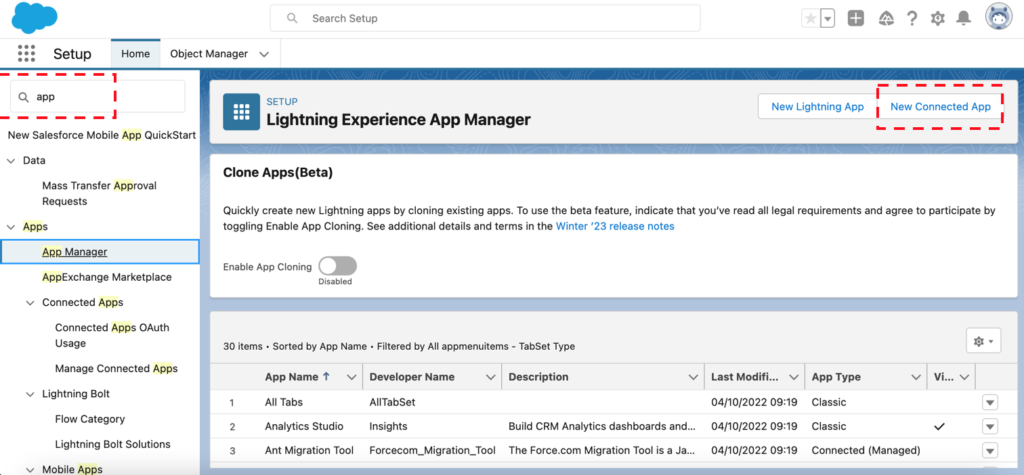
Click on “New Connected App” to create a connected app.

Fill the information:
- Connected App Name: DevOps Center
- API Name: DevOps_Center
- Contact Email: youremail@yourdomain.com
- Logo Image URL: https://tinyurl.com/doc-icon
- In Web App Settings, enter the Start URL: /sf_devops/DevOpsCenter.app
Click on save and then on Manage to manage the permission set assignment to the Connected App you just created.
Select the permission set: “sf_devops_NamedCredentials” and click on save

Assign permissions to use the Salesforce devOps center
Last step of the setup of the Salesforce devOps center: give the administrator the right to use it. Otherwise, you’ll not be able to launch it.
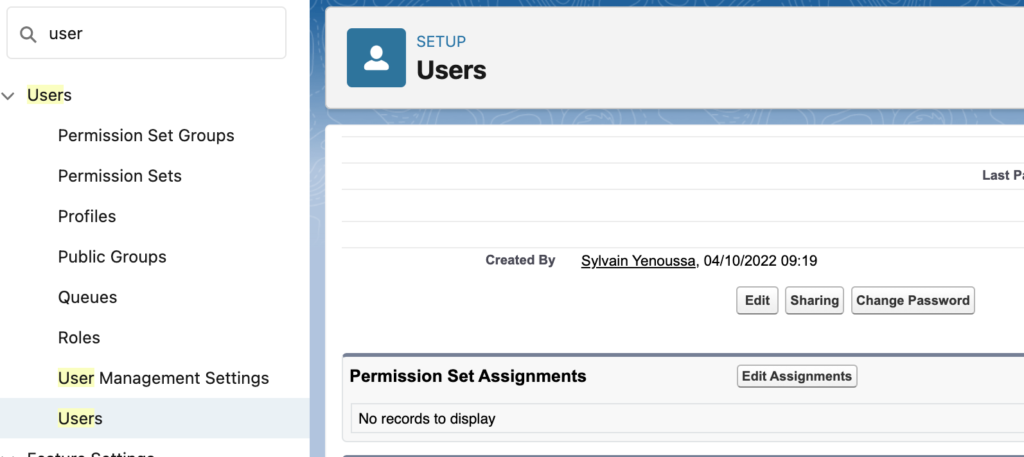
Go to Users > click on the user you want to add permissions on and scroll down to “Permission Set Assignements” and

Add the following permissions set to the user:
- DevOps Center
- DevOps Center Manager
- sf_devops_InitializeEnvironments
- sf_devops_NamedCredentials
You are done!
Good news, you’re done!
We have setup the Salesforce devOps Center and now it’s possible to open it.
Click on the main Menu, and search for DevOps Center

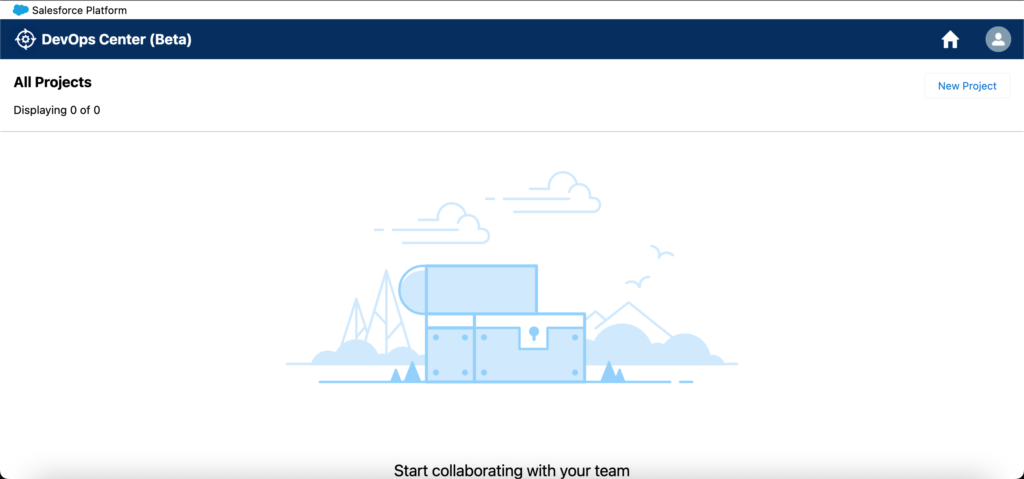
Click on it and TADA ! You can see the devOps center. But lets see in an other article how to configure it.

Next step
Hey! we still have some work to do! Have a look to the next article to link the devOps center and Github and configure your release pipeline.